Last updated - July 11, 2018
This article is part of WooCommerce Shipping Guide:
- A Beginner’s Guide to Shipping
- Basics Quick Guide
- Default Shipping Methods
- Premium Shipping Methods
- Shipping Zones
- Product Shipping Classes (current article)
- Common Shipping Scenarios
- Best Practices
- Legacy Shipping options
Setting up shipping classes is a great way to tackle certain challenges when you are selling varied categories of products. If your range of products needs different approaches in shipping due to the nature or size of the product, you can make use of shipping classes feature in WooCommerce. For example, if you are shipping bulky products or easily breakable products, it’s a good idea to categorize them under different shipping classes.
Read our Basics Quick Guide article to understand the basic shipping setup.
You can go to the Shipping Classes settings by navigating through the following path:
WooCommerce → Settings → Shipping → Shipping Classes
All your existing shipping classes will be listed here. To add a new shipping class, click Add Shipping Class button.

A new row will be displayed, where you can edit the details for the new shipping class.

How to edit my shipping classes?
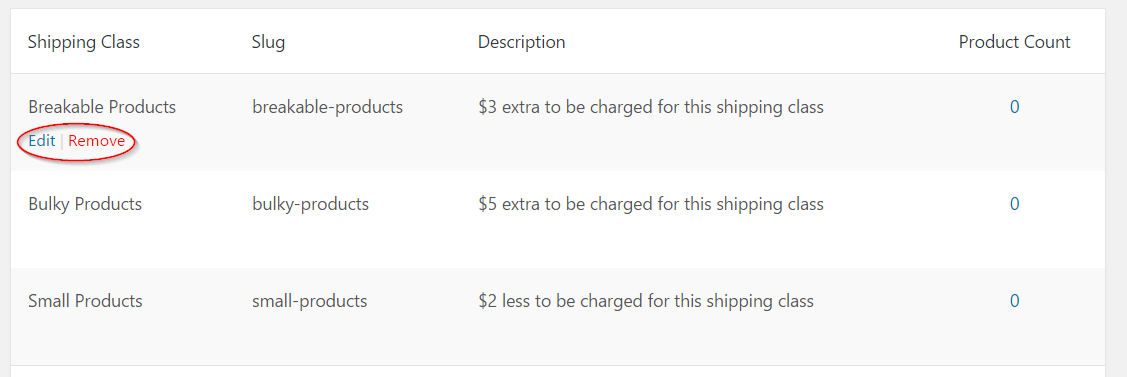
You can go to the list of shipping classes and hover the cursor around the class which you want to edit.
‘Edit’ and ‘Remove’ buttons will be displayed. You can click either of the buttons to continue.

How to add products to a shipping class?
Once you complete creating multiple shipping classes as per your requirement, you can add products to these shipping classes.
Access product settings from the admin panel on the left side of your screen. Hover the cursor around the product you want to edit and click Edit.

The Product page will be displayed. Scroll down to the Product Data metabox, and click Shipping on the left side.
You can see the Shipping class drop-down field. Select the shipping class where you want to include the product.

How to add products in bulk to a shipping class?
If you have a large set of products which you want to add to a particular shipping class, you don’t have to open the product editor page for each. Instead, you can go to the Products list, and add them together. Here is how:
Go to Products. Tick all the products you want to include a shipping class.

Click the ‘Bulk Action’ drop-down and select ‘Edit’ and click Apply button.

A new screen is displayed with options for bulk-edit. Scroll down to shipping class and choose the shipping class you want to include the selected products.

How to verify if the shipping classes are all working correctly?
WooCommerce recommends one more step while setting up Product shipping classes. You can temporarily enable Shipping Debug Mode after updating the shipping settings. Once shipping debug mode is activated, you can verify all your shipping rates and classes are correctly updated. Remember to disable the debug mode after verifying your settings.
You can enable and disable Shipping debug mode as described below:
Go to WooCommerce → System Status →Tools
Scroll down and tick to enable debug mode.
Untick to disable.


