Last updated - October 23, 2020
WooCommerce provides a lot of possibilities when it comes to setting up products in your store. This article intends to cover some of the basic features of products settings.
Please Note: In the earlier versions of WooCommerce, there used to be a Display tab associated with these settings. Instead in the current version, you will find the WooCommerce Customizer under Appearance (Appearance > Customize > WooCommerce). Please read our article on WooCommerce Customizer to know more.
First of all, you can go to the products settings page by navigating through the following path:
WooCommerce → Settings → Products
On your products settings section, you can see different tabs that deal with specific aspects of products settings. They are:
- General
- Inventory
- Downloadable Products
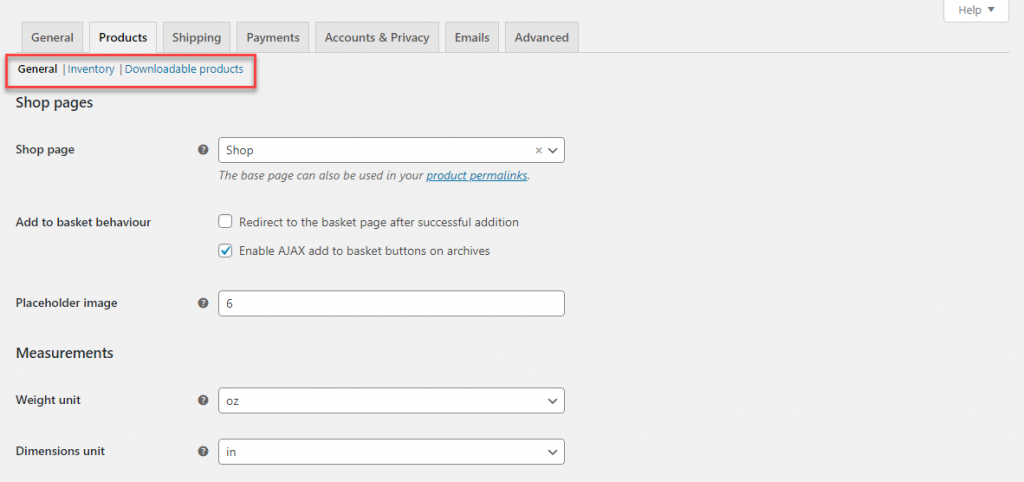
Shop pages
You can set the base shop page of your store here. Simply select from the drop-down and choose the shop page.
This tab deals with the units of measurement of your products and how product reviews are displayed on your storefront.
This page also determines the Add to Basket settings. You can redirect the customer to the Cart page after adding a product successfully. Here you can also enable AJAX add to basket buttons on archives.
You can also specify a product image placeholder here. This will provide a placeholder image for those products that do not have a product image.
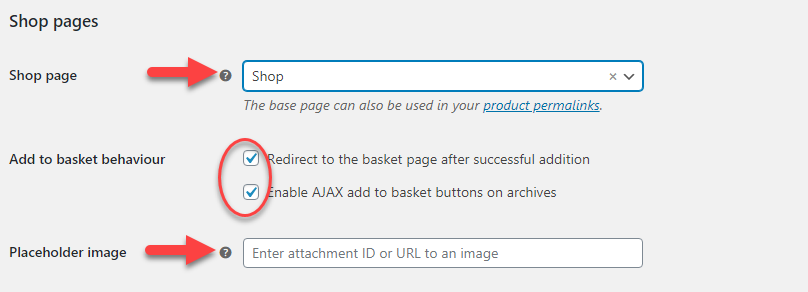
Add to basket behavior determines what will happen in the front-end of your store when a customer adds something to the cart. If you tick the first checkbox, the customer will be redirected to the cart page after every successful addition to the cart.
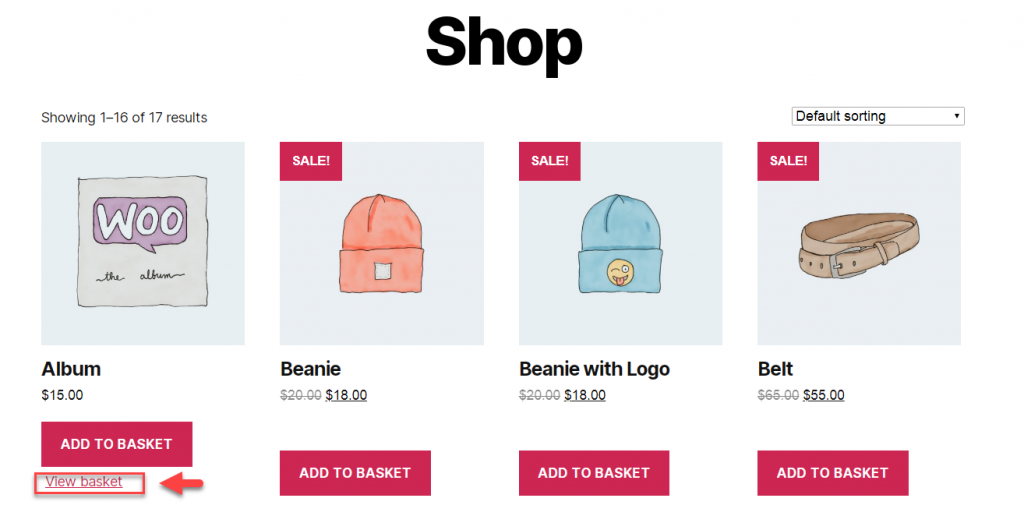
If you tick the second checkbox, the customer will not be automatically redirected to the cart page but a View cart option will be displayed along with a tick mark on the Add to cart button. This will help your customer continue shopping for other products without the endless back and forth between cart page and shop page.
Measurements
You can set Weight Unit from the drop-down according to the preference of the country you are selling to.

Similarly, you can set up the Dimensions Unit as well.

Reviews
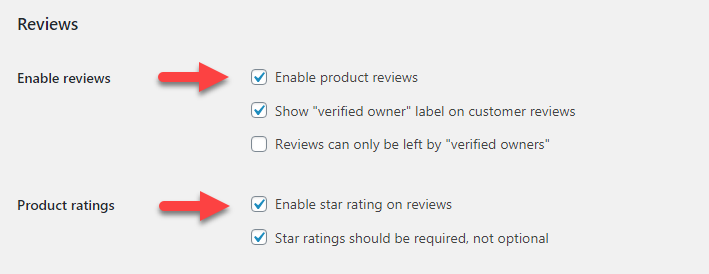
In the Reviews section, you can enable Product Rviews to allow your customers to rate the products that they purchase.
There are three settings to enable:
- Enable product reviews
- ‘Show “verified owner” label on customer reviews’ – this will differentiate actual customers who bought the product from other reviewers.
- Review can only be left by “verified owners” – only customers who actually bought the product can write a review on your store.
Also, you can enable Product ratings here. In addition, there is an option that makes star ratings should be required and not optional.
Do not forget to click Save changes button every time you update the settings.
Inventory
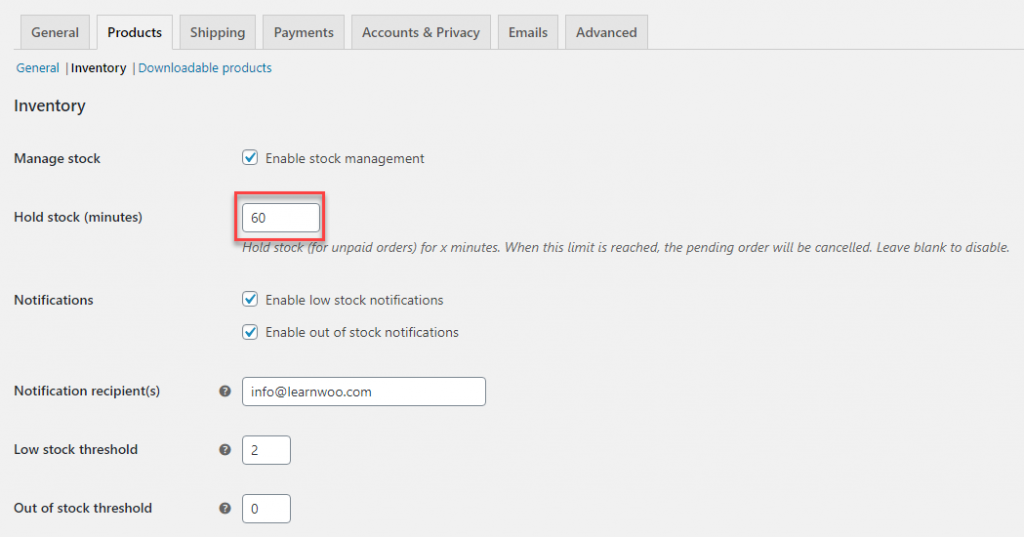
Next, we’ll move into the Inventory sub-menu, which helps to track your inventory. First of all, you have to ensure that the Stock Management checkbox is ticked.

You can choose the time limit until WooCommerce holds stock for an unpaid order. The order will be canceled beyond this time. The value you enter is in minutes and if you leave this field blank, the Hold Stock option will be disabled.
Dealing with the out-of-stock challenge
There are two fields that deal with low-stock and out-of-stock notifications. You can enable either or both by ticking the respective checkboxes.
Next, in the Notification Recipient(s) field, enter the email address that will get the notification. If you are entering multiple emails, remember to separate them by a comma.

You can also set threshold values for Low Stock and Out of Stock. This will help WooCommerce understand how you define low stock and out of stock. Use the arrow keys in the numeric text box to increase or decrease the values.
It is advisable to set a value more than one for Out Of Stock Threshold also as you need to keep some products in stock (in case you face any issues with a previous order).

Out Of Stock Visibility checkbox enables you to hide out of stock products. Tick this checkbox if you don’t want to show out of stock products in your product listing.

You can also set the Stock Display Format. Choose from the drop-down according to your preference. The options are:
- Always show stock e.g. “12 in stock”
- Only show stock when low e.g. “Only 2 left in stock” vs “In Stock”
- Never show stock amount

Once you update all the settings, do not forget to click Save changes button.
Handling downloadable products
The next sub-menu is an important one if you sell downloadable products on your store. The file download method has three options as follows:
- Force Downloads
- X-Accel-Redirect/X-Sendfile
- Redirect only
WooCommerce recommends the second one as the most reliable option. We will look into the merit of each of these settings in another article.

Access Restriction has two checkboxes to deal with how you want to set customer access for your downloadable products. These are:
- Downloads require login
- Grant Access to downloadable products after payment.

After completing the update for all the settings, do not forget to click Save changes button.
Your basic product settings are now complete. Moving forward, you can read about the process of adding products in another article.


