Last updated - April 1, 2021
This article is part of the guide for Different Product Types:
- How to Add a WooCommerce Simple Product?
- How to Add a WooCommerce Grouped Product?
- How to Add a WooCommerce Virtual Product? (current article)
- How to Add a WooCommerce Downloadable Product? (current article)
- How to Add a WooCommerce External Product? (current article)
- How to Manage a Variable Product?
We have already covered a few WooCommerce product types in detail. In this article, we will look into the process of adding virtual, downloadable and external (affiliate) products.
Adding a virtual product
The initial process of creating a virtual product is the same as any simple product. You can go to Products → Add Product
Enter the required information such as name, description, categories etc.
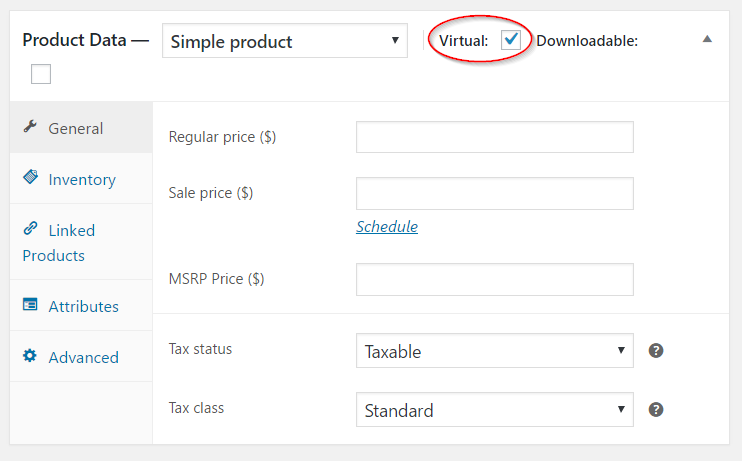
To make the product virtual, tick the ‘Virtual’ checkbox on the product type panel. Once you mark a product as virtual, the shipping section disappears from the Product Data metabox.

Adding downloadable products
Firstly, go to Products → Add Product
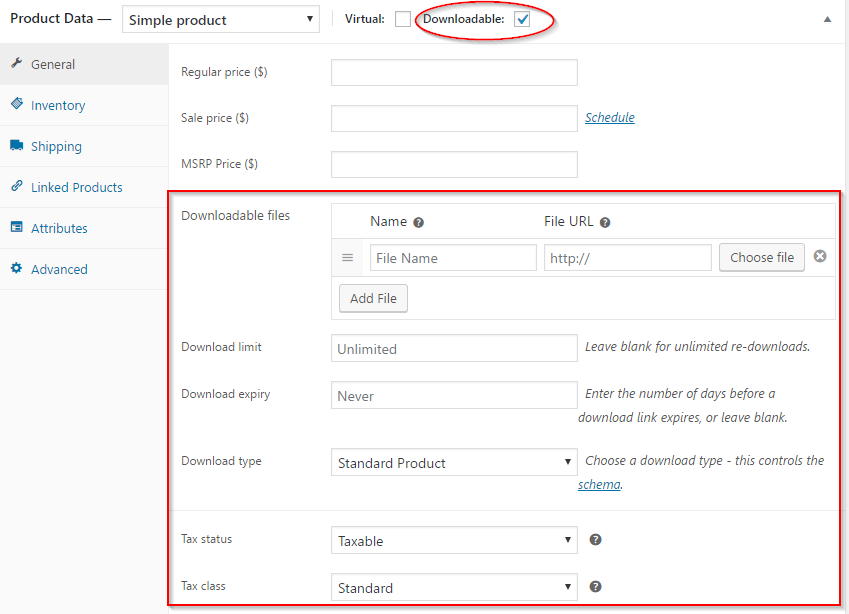
Similar to how you add virtual products, tick the downloadable product checkbox to make a product downloadable. When you tick the checkbox, the General section of the Product Data metabox displays a few extra fields to add information specific to the downloadable product type. These fields are as follows:
- Name and File URL – Click the Add file button to enter the name and URL of the downloadable product. Alternatively, you can provide the path for the file by clicking the Choose file button.
- Download limit – You can specify how many times your customer can re-download the product. To give unlimited re-download option for your customers, keep this field blank.
- Download expiry – Specify the number of days the download link stays active. After the specified number of days, the link expires.
- Download type – Choose from three options to specify what kind of downloadable product you are selling. The three available options are:
- Standard Product
- Application/Software
- Music

If there is a physical version of your downloadable product, you can set a shipping cost for that. And if no Physical version is available that needs shipping, you can tick the virtual product checkbox as well.
If you prefer a video version, please check out the below video:
Adding affiliate or external products
The process of creating an affiliate product is same as creating any other product. Go to: Product → Add Products.
Enter name, description and other required fields. In the product metabox, choose External/Affiliate product.
When you select this option, two additional fields will be added in the General section. These are:
- Product URL – Here you can enter the URL of the external seller who is selling this product.
- Button text – Display a text of your choice on the button linking your store to the external product. For a product that is directly sold in your store, this button shows ‘Add to Cart’.
Some fields that are not needed for an external product (inventory, shipping, tax, etc.) will disappear as well.

Read a few tips for efficient product management here.
Related posts:


